
If you have ever built a simple HTML website, portfolio, landing page, or business website, you may have wondered: Why should I pay for web hosting every month when my website does not even need a database or server-side processing?
The good news is—you don’t have to.
In this tutorial, I am going to show you how you can host a static website completely free using Cloudflare and connect it to your own custom domain.
This method is ideal for HTML, CSS, and JavaScript-based websites. You can upload your website, make it publicly accessible, connect your own domain, and get HTTPS—all without purchasing a traditional shared hosting plan.
I’m Ankit Srivastava, and I have been working with websites, WordPress, digital marketing, IT training, and web technologies for more than a decade. I particularly like solutions that simplify technology and reduce unnecessary costs. Cloudflare Pages is one such solution.
Let’s understand the complete process step by step.
Step 1: Understand What We Are Going to Build
Before starting, let us understand the setup.
Normally, hosting a website requires two things:
Domain + Web Hosting
Your domain might look like:
yourwebsite.com
Traditional web hosting stores your HTML files, images, CSS, JavaScript, and other website resources on a server.
In our setup, however, we will use:
Your Custom Domain + Cloudflare + Cloudflare Pages
Cloudflare Pages can deploy static website files to Cloudflare’s global network. Cloudflare officially supports deploying ordinary static HTML websites, so you do not need React, Next.js, or another framework just to use it.
For static assets, Cloudflare Pages provides free and unlimited static requests, and its Free plan supports custom domains. This makes it particularly useful for portfolios, landing pages, documentation sites, simple company websites, and frontend projects.
The important distinction is that hosting can be free, but your custom domain itself is not necessarily free. If you already own a domain, you can connect it without purchasing a conventional hosting package.
Step 2: Prepare Your Static Website
First, prepare the website you want to host.
A very basic static website may have a folder structure like this:
mywebsite/
│
├── index.html
├── about.html
├── contact.html
│
├── css/
│   └── style.css
│
├── js/
│   └── script.js
│
└── images/
    └── logo.png
The most important file is usually:
index.html
This acts as the homepage of your website.
You can build your static website using:
- HTML
- CSS
- JavaScript
- Bootstrap
- Tailwind CSS
- Static site generators
- Prebuilt frontend templates
Before uploading anything, open index.html locally in your browser and verify that the website works correctly.
Check your navigation links, images, CSS, JavaScript, fonts, and other assets.
One common mistake is using local computer paths such as:
C:\Users\Ankit\Desktop\website\images\logo.png
These paths will not work online.
Instead, use relative paths such as:
<img src="images/logo.png" alt="Logo">
Once everything works locally, you are ready to deploy.
Step 3: Create a Free Cloudflare Account
Now you need a Cloudflare account.
Create an account or sign in to your existing Cloudflare account.
Cloudflare offers many services, including:
- DNS management
- CDN
- SSL/TLS
- Security
- DDoS protection
- Cloudflare Workers
- Cloudflare Pages
For this tutorial, our primary focus is Cloudflare Pages.
If your domain is already managed through Cloudflare DNS, the custom-domain setup becomes particularly straightforward.
If it is not yet on Cloudflare, you can still start by deploying your website first and configure the domain afterward.
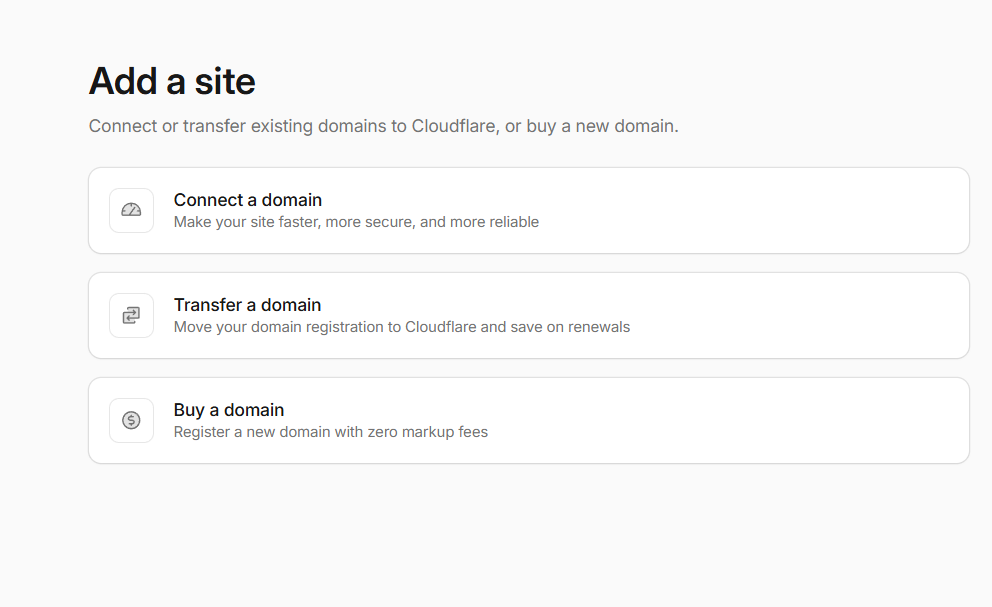
Step 4: Create Your Cloudflare Pages Project
Inside your Cloudflare dashboard, navigate to the area for Workers & Pages and create a new application or Pages project.
Cloudflare provides different deployment approaches, including Git integration and Direct Upload.
For this beginner-friendly tutorial, we will use Direct Upload.
Direct Upload is useful when your website files are already available on your computer and you simply want to upload and publish them.
Choose the Direct Upload option and give your project a name.
For example:
ankit-portfolio
Cloudflare will use the project name to create a temporary Pages address similar to:
ankit-portfolio.pages.dev
Do not worry about this address. Later, we will connect our own domain.
Step 5: Upload Your Website Files
Now comes the easiest part.
Upload your prebuilt website assets to the Pages project. Depending on the current dashboard workflow, you can drag and drop your website folder or supported archive/assets into the upload area.
Make sure your website contains the correct entry file:
index.html
Then deploy the website.
Cloudflare will process the files and publish your website to its network.
After deployment, you should receive a Pages URL similar to:
your-project.pages.dev
Open this URL in your browser.
Your website should now be live on the internet.
At this point, you have technically achieved free static website hosting.
But we still need to complete the most important part: connecting your own domain.
Step 6: Add Your Domain to Cloudflare
Suppose you own:
example.com
If you want to use the apex/root domain—such as example.com—with Cloudflare Pages, the domain needs to be added as a zone in the same Cloudflare account as your Pages project, and its authoritative nameservers need to point to Cloudflare.
Add or onboard your domain through the Cloudflare dashboard.
Cloudflare will provide nameservers that look conceptually like:
xxxx.ns.cloudflare.com
yyyy.ns.cloudflare.com
The exact names will be different for your account.
Now log in to the registrar where you purchased your domain.
This could be any domain registrar.
Find the Nameservers or DNS/Nameserver Management section and replace the existing authoritative nameservers with the nameservers Cloudflare assigned to your domain.
Save the changes.
DNS changes may take some time to propagate, so do not worry if activation is not instant.
Once Cloudflare confirms that the domain is active, you can proceed.
Step 7: Connect Your Custom Domain to Cloudflare Pages
Open your Pages project.
Go to:
Pages Project → Custom Domains
Choose:
Set up a domain
Enter the domain you want to connect.
For example:
example.com
or:
www.example.com
Continue through the activation process.
If the domain is already correctly managed through Cloudflare, Cloudflare can configure the necessary DNS mapping for the Pages project.
After DNS and certificate provisioning complete, your static website should become accessible through your custom domain.
Instead of visitors seeing:
your-project.pages.dev
they can visit:
example.com
That means your professional custom-domain website is now running without a traditional monthly hosting package.
Step 8: HTTPS and SSL Certificate
Another major benefit of this setup is HTTPS.
You want visitors to access your website using:
https://example.com
rather than an insecure HTTP connection.
Cloudflare handles certificate provisioning for properly configured Pages custom domains, so in a normal setup you do not need to manually purchase and install an SSL certificate as you might with some traditional hosting environments.
Once the domain is active, test:
https://example.com
You should see the secure HTTPS connection in your browser.
This gives you:
Free static hosting + Custom domain support + HTTPS
That is a very useful combination for lightweight websites.
Step 9: How Do You Update the Website?
Suppose you later change your website.
Maybe you update:
index.html
add new images, modify CSS, or add another page.
If you created the project using Direct Upload, you can create a new deployment by uploading the updated assets again.
Cloudflare then deploys the new version.
For developers who update websites frequently, I recommend considering Git integration when creating the project.
With a Git-based workflow, you can connect a supported Git repository and have Cloudflare automatically build and deploy changes when you push updates.
There is one important planning detail: Cloudflare documents Direct Upload and Git integration as different project workflows, and you cannot simply convert a Direct Upload project into a Git-integrated project later. You would create a new project if you decide to switch.
For beginners or websites updated occasionally, Direct Upload is usually the simplest starting point.
Step 10: What Types of Websites Can You Host This Way?
This method is excellent for:
- Personal portfolios
- Resume websites
- Company profile websites
- Product landing pages
- Marketing campaign pages
- Event websites
- HTML templates
- Documentation websites
- Educational resources
- JavaScript frontend projects
- Static blogs
- Prototype websites
However, you need to understand what static hosting means.
A traditional PHP application like:
login.php
cannot simply be uploaded and executed as PHP on Cloudflare Pages.
Similarly, traditional MySQL-based server applications will not run just by uploading their files.
For example, you cannot directly host a conventional:
PHP + MySQL
WordPress installation using the same static deployment method.
You can, however, generate a static version of a WordPress website and deploy that output. Cloudflare even documents a workflow for deploying statically exported WordPress sites.
So always ask:
Does my website require server-side processing?
If the answer is no, static hosting may be an excellent option.
Step 11: Why I Like This Setup
One reason I recommend learning this method is that many developers automatically purchase traditional hosting even when the project does not require it.
Imagine you are creating a simple portfolio containing:
HTML
CSS
JavaScript
Images
There is no database.
There is no PHP.
There is no backend application.
In such a case, paying every month purely to serve static files may be unnecessary.
Cloudflare Pages distributes static files through Cloudflare’s network, and Cloudflare currently states that static asset requests are free and unlimited. The Pages Free plan also supports up to 100 custom domains per project, subject to Cloudflare’s platform limits and policies.
This makes it a powerful option for lightweight production websites as well as experiments and learning projects.
Important Things to Remember
There are a few points I want you to remember before using this setup.
First, your domain is not automatically free. You still need to own or register the domain unless you are happy using the provided pages.dev address.
Second, this tutorial focuses on static website hosting. Backend applications may require Cloudflare Workers, external APIs, databases, or another server environment.
Third, keep a backup of your website source files. Cloudflare Pages is your deployment platform, but your local files or Git repository should remain your source of truth.
Finally, if you plan to update the website frequently, consider setting up a Git-based deployment workflow from the beginning.
Conclusion
Hosting a website does not always have to mean purchasing a shared hosting package, configuring cPanel, creating FTP accounts, and paying recurring hosting charges.
If your website is static, modern platforms such as Cloudflare Pages give you a much simpler deployment model.
The complete process is essentially:
Build your static website → Create a Cloudflare Pages project → Upload or deploy your files → Test the Pages URL → Connect your domain → Enable HTTPS → Go live.
What I like most about this approach is its simplicity.
A student can use it for a portfolio. A developer can use it for a frontend project. A digital marketer can host a campaign landing page. A small business can deploy a lightweight informational website. And developers can integrate Git for automated deployments.
If you are learning web development, I strongly recommend trying this yourself instead of only reading about it. Create a basic index.html, deploy it to Cloudflare Pages, connect a test domain or subdomain, and understand how DNS and deployment actually work.
That practical experience will teach you not only how to host a website for free, but also how domains, DNS, HTTPS, CDNs, and modern static deployment platforms work together.