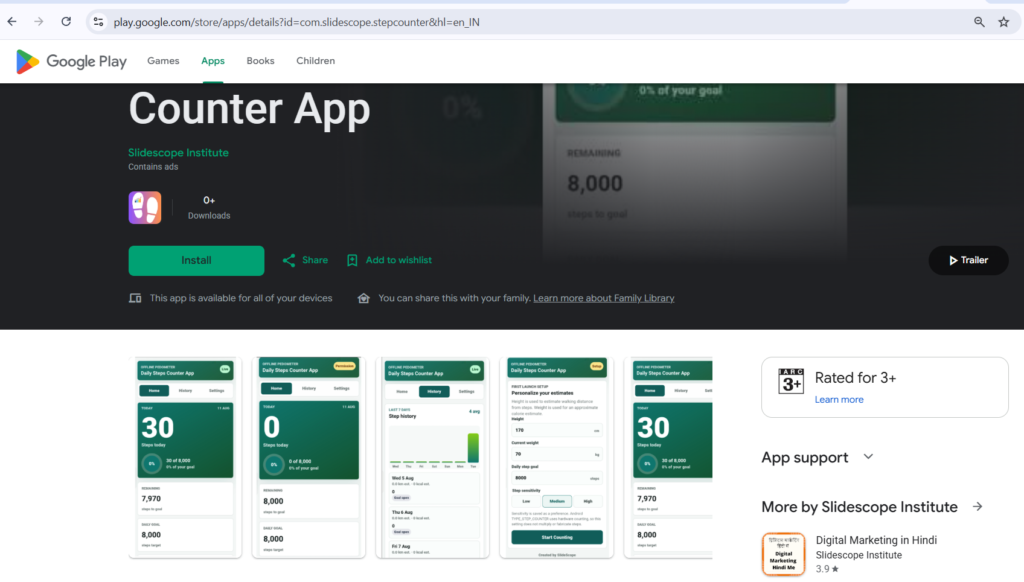
If you already know HTML, CSS, JavaScript, PHP, or Python, Android development can initially feel unnecessarily complicated.
Here is the complete video tutorial of the same of the process:
When I started working through this process, I wanted to answer a simple question:
Can I take a normal web application and turn it into a real Android application without learning Android Studio, Kotlin, Java, and the entire traditional Android development ecosystem?
The answer is yes.
For this project, I used Capacitor. Capacitor allows a web application to run inside a native Android application while also giving the web application access to native Android functionality through plugins and native APIs.
That means we can build the interface using technologies we already understand:
- HTML
- CSS
- JavaScript
- Vite
- npm
and then package that application as an Android app.
This tutorial is Part 1 of the process.
In Part 1, I am intentionally keeping things simple. We will create the basic web application, install Capacitor, configure Android, install the required Android command-line tools, connect the Android SDK to the project, synchronize the web application with Android, and produce a basic Android build.
We will not cover release signing, keystores, Google Play Console, AAB publishing, or detailed device debugging in this part.
Those belong in Part 2.
1. What We Are Building
The basic structure looks like this:
HTML
CSS
JavaScript
   ↓
Vite Web App
   ↓
Capacitor
   ↓
Android Project
   ↓
APK / Android App
The important concept is that Capacitor does not magically convert PHP into Android code.
Instead, the browser-based part of the application becomes the user interface inside the Android application.
For example, if your application has:
src/
├── assets/
├── main.js
├── style.css
└── index.html
Capacitor can package the resulting web application into an Android project.
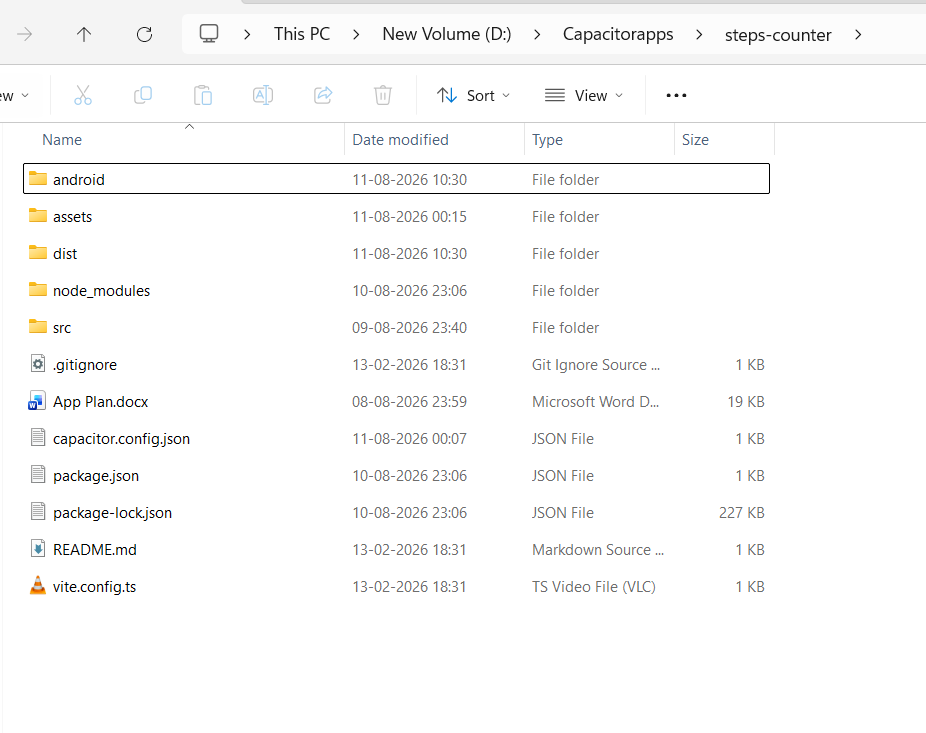
For our Steps Counter project, the project was eventually located at:
D:\Capacitorapps\steps-counter
2. Install Node.js
The first major requirement is Node.js.
After installing Node.js, open Command Prompt and verify:
node --version
Then:
npm --version
If both commands return version numbers, Node.js and npm are available.
For Windows, I recommend using Command Prompt or PowerShell, depending on your environment.
One small Windows issue I encountered was PowerShell blocking npm.ps1. When that happens, using the Windows command wrappers works:
npm.cmd
and:
npx.cmd
So instead of:
npm run build
you can use:
npm.cmd run build
And instead of:
npx cap sync android
you can use:
npx.cmd cap sync android
This is a useful Windows-specific trick.
3. Create the Web Application
We can start with a normal Vite application.
Create the project:
npm create vite@latest steps-counter -- --template vanilla
Move into the project:
cd steps-counter
Install the existing dependencies:
npm install
At this point, we have a completely normal web application.
You can test it using:
npm run dev
Vite will provide a local development URL, usually something similar to:
http://localhost:5173
Open that URL in your browser.
At this stage, there is nothing Android-specific yet.
That is one of the things I like about this approach.
You can develop the UI like a normal website.
4. Install Capacitor
Now we add Capacitor.
Install the Capacitor core package:
npm install @capacitor/core
Install the Capacitor command-line interface:
npm install -D @capacitor/cli
Then initialize Capacitor:
npx.cmd cap init
Capacitor will ask for information such as:
App name
Steps Counter
and an application ID.
For our final application, I used:
com.slidescope.stepcounter
The application ID is important.
Think of it as the unique identifier of the Android application.
Once an app is published, changing this identifier effectively creates a different Android application.
5. Configure the Web Directory
Capacitor needs to know where the compiled web application will be located.
For a Vite application, the production build normally goes into:
dist
Therefore, the Capacitor configuration should contain:
webDir: "dist"
The important concept is:
src/
   ↓
Vite build
   ↓
dist/
   ↓
Capacitor
   ↓
Android
Capacitor does not normally package your development source files directly.
It packages the built web application.
6. Install Android Support
Now install the Android platform package:
npm install @capacitor/android
Then add Android to the project:
npx.cmd cap add android
This creates the native Android project.
You should now see something similar to:
steps-counter/
├── android/
├── src/
├── dist/
├── package.json
├── capacitor.config.*
└── ...
The android directory is the native Android project generated by Capacitor.
This is where Gradle, Android manifests, Java/Kotlin code, Android resources, and native configuration live.
7. Install the Android SDK Command-Line Tools
This was one of the more confusing parts of the process.
You do not necessarily need Android Studio.
You can use Google’s Android command-line tools.
In my setup, the SDK eventually existed at:
D:\AndroidSDK
The command-line tools were installed under:
D:\AndoridSdk\cmdline-tools\latest\bin
Notice that the original folder was named AndoridSdk.
That spelling is not important as long as the actual SDK path is configured consistently.
The SDK manager can be checked with:
sdkmanager.bat --version
In my environment, it reported:
22.0
The command-line tool also displayed a warning that sdkmanager is deprecated in favor of the newer Android CLI tooling. That warning does not necessarily mean the installed SDK cannot build the project.
8. Install the Required Android Components
The Android project needs the appropriate SDK components.
For example:
sdkmanager.bat "platform-tools"
Install the required Android platform:
sdkmanager.bat "platforms;android-36"
And build tools:
sdkmanager.bat "build-tools;35.0.0"
The exact versions can vary depending on the Capacitor and Android Gradle configuration of your project.
Our project eventually used:
compileSdkVersion 36
targetSdkVersion 36
minSdkVersion 24
9. Java and Gradle
Android builds also require Java.
Our setup used:
Java 21
The Java installation was:
C:\Program Files\Java\jdk-21.0.11
Check Java:
java -version
Gradle is used by the Android project to perform the actual build.
Our project used:
Gradle 8.14.3
You don’t necessarily need to install Gradle globally because Android projects commonly include a Gradle Wrapper.
That means the project can use:
gradlew.bat
from the Android directory.
10. Tell Gradle Where the Android SDK Is
This is where we encountered one of our first real errors.
Gradle complained:
SDK location not found.
Define a valid SDK location with an ANDROID_HOME environment variable
or by setting the sdk.dir path in local.properties
The easiest project-specific solution is the Android local.properties file.
Inside:
D:\Capacitorapps\steps-counter\android
create:
local.properties
and specify:
sdk.dir=D:\\AndroidSDK
The double backslashes are important in this properties-file format.
Now Gradle knows where the Android SDK is located.
This solved the SDK-location problem.
11. Build the Web Application
Before synchronizing Android, compile the web application:
npm.cmd run build
You should see Vite generate the production files in:
dist/
This step is important.
If you modify your HTML, CSS, or JavaScript and want those changes inside Android, you generally need to rebuild the web application before synchronizing it.
12. Synchronize Capacitor
Now synchronize the web application and Capacitor configuration with Android:
npx.cmd cap sync android
You should see messages similar to:
Copying web assets from dist to android\app\src\main\assets\public
and eventually:
Sync finished
This means the compiled web application has been copied into the Android project.
The process is essentially:
src/
 ↓
npm run build
 ↓
dist/
 ↓
npx cap sync android
 ↓
android/app/src/main/assets/public/
13. Build the Basic Android Application
Now move into the Android project:
cd android
Then run:
gradlew.bat assembleDebug
This creates a debug APK.
If everything is configured correctly, you should eventually see:
BUILD SUCCESSFUL
The APK will normally be located at:
app\build\outputs\apk\debug\app-debug.apk
So the full path in our project was:
D:\Capacitorapps\steps-counter\android\app\build\outputs\apk\debug\app-debug.apk
At this point, we have successfully transformed our web project into an Android application build.
14. What We Have Achieved
Let’s stop here and understand what happened.
We started with:
HTML + CSS + JavaScript
and ended with:
Android APK
without creating the application in Android Studio.
The major commands were:
npm create vite@latest steps-counter -- --template vanilla
cd steps-counter
npm install
npm install @capacitor/core
npm install -D @capacitor/cli
npx.cmd cap init
npm install @capacitor/android
npx.cmd cap add android
npm.cmd run build
npx.cmd cap sync android
cd android
gradlew.bat assembleDebug
The Android SDK was configured separately, and Gradle was told where the SDK was located through:
android/local.properties
with:
sdk.dir=D:\\AndroidSDK
15. What We Are NOT Doing Yet
This is deliberately the end of Part 1.
We are not covering:
- Release signing
- Creating a
.jkskeystore keytoolkeystore.properties- Release signing configuration
bundleRelease- Creating an Android App Bundle
- AAB signing
- Google Play Console
- Play Store listing
- Privacy policy
- Data Safety declaration
- App icon and splash customization
- Production publishing
- Release testing
- Google Play review
Those are part of the production-release workflow.
There is also an important distinction between a debug build and a signed release build. A debug build is useful during development, while a production application distributed through Google Play requires proper release signing.
Conclusion
The biggest lesson from this process is that you don’t necessarily need to become a traditional Android developer just to create an Android application.
If your application is primarily web-based, Capacitor gives you a practical bridge between web development and Android.
You can continue using:
HTML
CSS
JavaScript
Vite
npm
while Capacitor handles the Android wrapper.
The Android side does become more complicated when you need native functionality. For example, our Steps Counter eventually required access to Android’s physical activity sensor. That is where Capacitor’s native plugin architecture becomes particularly useful.
But the foundation remains straightforward:
Build the web app
       ↓
Install Capacitor
       ↓
Add Android
       ↓
Configure Android SDK
       ↓
Build the web application
       ↓
Sync Capacitor
       ↓
Run Gradle
       ↓
Get APK
Once this basic pipeline works, you have a repeatable foundation for creating Android applications from web technologies.
Part 2 will take this basic application from an unsigned development build through release signing, keystore creation, AAB generation, Google Play Console configuration, and production publishing.